My husband and I just celebrated our 9th anniversary yesterday - crazy to think that we've been together for 15 years, married for 9!! I always try to be a little crafty (or find hand-crafted things) when it comes to anniversary gifts, if time and talents allow. A quick Google search revealed that the traditional gifts for the 9th anniversary are pottery and willow, but that the modern gift is leather. Well, thank goodness for that since I don't know how to do pottery (although I'd love to learn someday), and we don't have a weeping willow tree to carve our initials into (although that was my favorite tree growing up).
So, I decided to go the leather route...and then realized that I didn't have any scrap leather laying around ready to be turned into something fantastic. However, I did have some Cricut faux leather waiting to be used - it has a woodgrain pattern embossed on it, too! So I found a wooden plank pallet at my local craft store & thought I'd cut out the Denver Broncos logo and lettering from the faux leather, on my Cricut Explore. This was my first attempt using the faux leather, and although the finished product looked good in my head, I was still a little hesitant to put all my faith into this machine. I soon learned my fears were totally unnecessary!
I started by finding a decent silhouette image of the Broncos logo in png format that I opened in Adobe Photoshop Elements 15. I resized the image and cleaned up the edges, then resized it back down to 75 dpi for use as a cut file. If I try to use an image with 300 dpi or higher, the cut lines will not be smooth, as the Explore picks up on any fine details and will actually cut those out. I uploaded the image as a cut file to Cricut Design Space, where I could choose the size and layout the text. I made the image 11.5" wide, so that it would fit well on the 14" x 14" pallet and could also be cut on a standard size mat.

There is a custom setting already in the Explore for faux leather (300 pressure, multicut x2), so I went ahead and used that setting along with a brand new standard grip mat and the carbide blade. The machine easily cut through the material, and the extra material came off of the mat well without any parts adhering to the actual image. However, once I took the Broncos logo off of the mat, I noticed deep cuts in the mat itself. I realized that the extra cut was probably not necessary, so I went into Design Space and added a new custom material setting for faux leather that had the same pressure but only one cut. I didn't want to change the original setting, just in case I came across some faux leather that actually required two cuts.

I turned the same cutting mat upside down and used the bottom half to cut out the image again with the modified settings. While I still had the image ready to cut, I put some kraft 80 lb cardstock onto a light grip mat and cut out the same image. I used the negative space from this cut as a guide for when I adhered the leather to the wood. I chose to use kraft colored cardstock instead of white so that it would be more visible over the white washed wood. Even though image was slightly bigger than the width of the cardstock, I really just needed the body of the image for lining it up.
![]()
Using the installed Broncos font, I typed GO BRONCOS and cut it from the faux leather, using the same top area of the cutting mat. Design Space ignores typed spaces, probably to eliminate wasting material, so everything was cut out on the same line, evenly spaced. Once again I did the same cut into cardstock to help align the letters, although I spaced the words apart so that I had more space when separating them.

Once I figured out where I wanted the image and text to lay on the wood, I taped down my cardstock with washi tape, and started to adhere the pieces with multi medium matte. I started with the logo and liberally coated the back of each piece of faux leather using a small brush and placed the pieces inside the coordinating negative spaces. Once the pieces were pressed down onto the wood, I lifted up the cardstock around it and cut it away before the glue dried it together. There were a couple of spots where the wood was not level, and I had to place some foam squares behind those areas to keep the faux leather surface level.
![]()
I placed something heavy on top of the adhered pieces for a few minutes to make sure everything dried flat. Here's a close up of the embossed woodgrain texture.
![]()
I repeated these same steps with the letters. These were a little trickier since they were smaller and a little flimsier. Having the negative space cardstock really helped out for this part. I held them in place for a few minutes with various acrylic blocks while the glue set up.

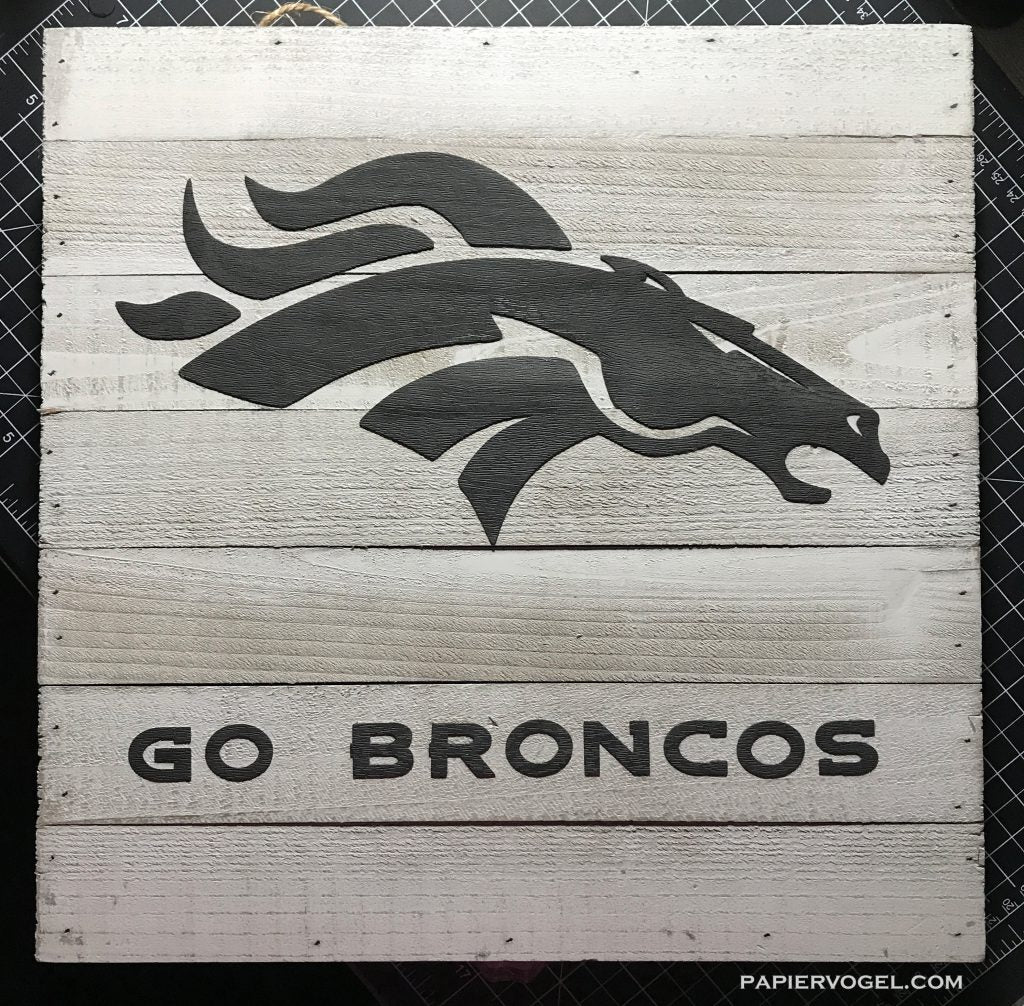
Here's the completed project again:
![]()
Next, it was time to work on my card. I wanted to mimic the wood pallet look, so I used the Petals and Pallets stamps and dies from Concord & 9th. I first cut the pallet pieces from Bazzill Taffy cardstock, then stamped the woodgrain pattern on using my MISTI and Barely Beige ink from Simon Says Stamp. I cut off the tiny tabs from one of the pallet pieces so I could line it up right against the other one (with tabs) to create a full pallet for an A2 card. I used small pieces of tape to hold them together while I stamped the sentiment on the front.

Using my MISTI, I stamped the sentiment in Hero Arts Wet Cement. I did need to stamp the words more than once to get a nice solid image, so the MISTI was super helpful for that.

I then cut strips of foam tape and covered each slat, to pop this pallet up on the front of an A2 top fold landscape card base. For the card base I used heavyweight white cardstock cut to 8.5" x 5.5" and scored at 4.25" then folded and pressed with a bone folder.

I chose to use the floral images from the same Petals & Pallets set to decorate the pallet, and stamped the images onto white cardstock in colors similar to Broncos orange and blue. The colors I used were Hero Arts Navy and Lime Green, and Ranger Blue Ribbon and Cheese Puff. I cut out the flowers and leaves with the coordinating dies, except for one leaf image that I masked and stamped, then fussy cut. I adhered the flowers and leaves to the upper right corner with ATG tape, glue dots, and foam squares.

Of course, my kids wanted to make cards for their daddy too, so they picked out some wood pallet patterned papers and stamped a variety of hearts all over. The insides were decorated with drawings, scribbles, and a sentiment from Avery Elle's Lots Of Love.
