Our daughter - my sweet rainbow baby - just turned SIX, and this year she requested a candy theme for her birthday. I had recently purchased the Candy Land Kit from Queen & Co., so it took center stage in creating the invitations.
I knew I wanted to incorporate some kind of shaker element, and this kit is perfect for that! I turned to Bazzill cardstocks for their yummy colors and the fact that I had some already in my stash. I used Robin's Egg for the candy jars, Grape Delight for the wrapped candies, Candy Hearts for the lollipops, and Sour Grape for the circles that went behind the lollipops. I also got coordinating colors of craft foam in turquoise and purple, which I used to create part of the wells for the shaker bits.
I first started off by cutting multiple strips of craft foam and cardstock down to the sizes I needed for each die. I then covered the craft foam strips with 3L double sided adhesive on both sides. I ran everything through my Big Shot with the dies many, many times - I made 30 total invitations - and made little piles for each element. I also ran some 3mm white craft foam through with just a circle die, once I had an idea where the wrapped candy was going to be placed. I wanted a nice deep well for the shaker bits to move around, but didn't want it popping off the top of the card too high, so I chose to do two layers of craft foam that sandwiched the card front. So basically one layer of white craft foam underneath the dotted card front, and one layer of colored craft foam on top of the card front. Here's a picture from the side to help clarify all that gibberish.

Let me see if I can explain this clearly. I knew I wanted to use Bazzill dotted cardstock for the base of the card front, so I cut some 12x12 pieces down into A2 size rectangles. I took some of the striped paper from the 6x6 pad included in the kit, and adhered small strips for a bottom border on the card front using my ATG. I figured out where the wrapped candy would sit, and then die cut a hole that was slightly larger than the opening in the candy die from the kit. I used the WRMK Nesting Circles die set to find the perfect size. I then took the next largest circle and cut the hole out of the white craft foam (cut slightly smaller than A2 size), making sure to place it exactly so it would line up behind the hole in the card front. I chose the next largest circle so that the white foam wouldn't be as visible underneath. I adhered each piece of dotted cardstock to the 3mm foam using my ATG.

And I did this 30 times...

I used the same circle die to cut 30 circles from a sheet of acetate, then sandwiched these clear circles between the purple cardstock and the purple foam covered with adhesive. I removed the back from the other side of the purple foam and placed each wrapped candy over the die cut holes. Now that I had an idea of how the wrapped candies were laid out, I used an X-ACTO knife to cut a rectangular well for the candy jar's shaker. I made the cut exactly above the striped paper strip, as I wanted the strips to help ground the jars. The X-ACTO knife easily cut through the layers of dotted cardstock and 3mm craft foam. I adhered the cardstock jars onto the turquoise craft foam jars, again sandwiching rectangles of acetate between the layers to create the shaker windows. I then removed the backing off the other side of the turquoise craft foam and adhered each jar onto the card front, over the opening.
I flipped each card front over and ran my EK Success powder tool around the inside edges of foam to remove any stickiness from the adhesive. I placed strips of strong scor-tape all around the openings and the rest of the foam. I then filled the jars with rainbow confetti sequins, and the wrapped candies with multicolored seed beads. I adhered the card bases face down to the back of each card front and pressed all over to make sure everything was attached well. I had printed the invitation details onto each card base ahead of time, but still needed to adhere the lollipops to them. I used small dots of liquid Tonic Nuvo deluxe adhesive to adhere the lollipop swirl part to the circles, and then scor-tape to adhere it all to the card base.

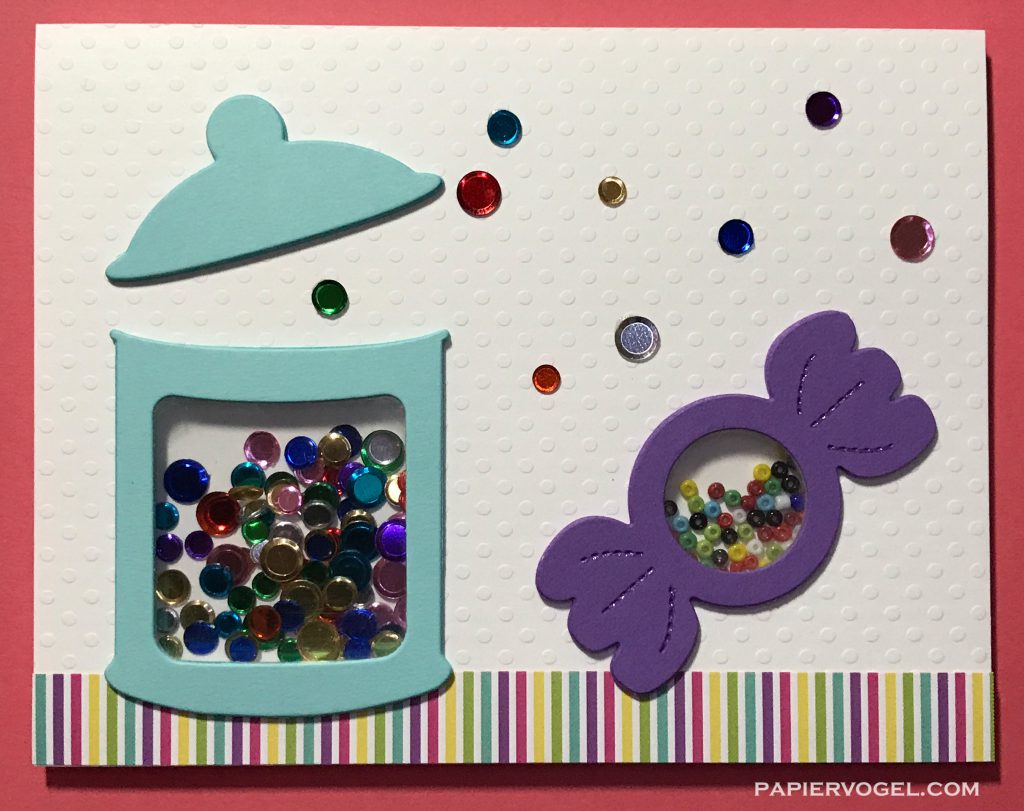
To finish the front of the cards, I added the jar tops (with turquoise foam underneath, to creat the same dimension as the jars) at an angle as if the jars were open. An assortment of rainbow confetti sequins were adhered with dots of Ranger multi medium matte, using a Marvy jewel picker tool, and scattered to look like they were spilling out of the jar.

I then drew over the pierced dotted lines on the wrapped candies with a purple Sakura metallic pen just to give it a little more definition and shimmer.
![]()
Since these cards were extra thick (from the 5mm total of foam), they wouldn't fit into standard A2 envelopes, so I opted to use A6 envelopes instead. Eight of the invitations were mailed to family for her first party that took place on her actual birthday. The rest were handed out to classmates and friends for her other party at the Little Gym. She had a lot of fun celebrating with everyone, and it was wonderful to see her so happy!
