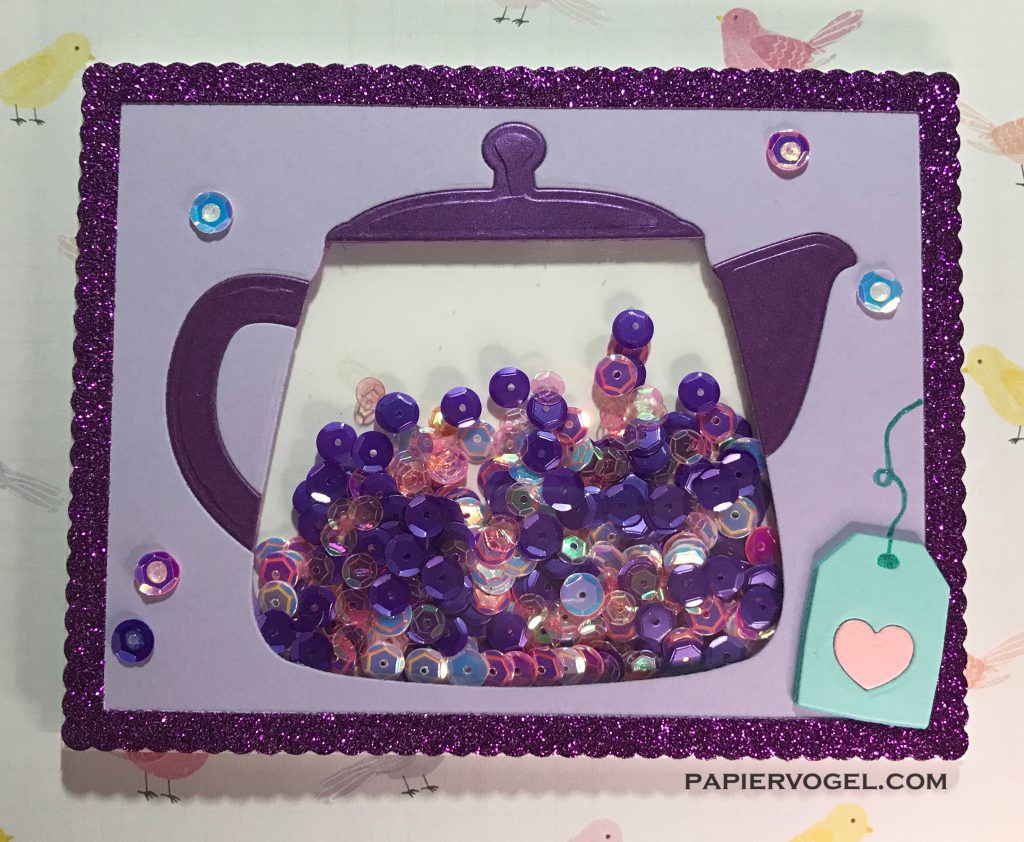
Our daughter was invited to a birthday tea party for one of her classmates, so we thought she'd like to receive a teapot shaker card. This Tea Time die set from Mama Elephant came out in their February 2018 release, and I just had to get it!
I started off by cutting the frame from some Purple Glitter Silk cardstock using the largest of Avery Elle's Scalloped Pierced Rectangle dies. The center panel was made from some Bazzill Sour Grape cardstock, and cut to just shy of the scalloped rectangle dimensions. I cut the tea pot completely from the Bazzill cardstock, and then used Neenah's So...Silk purple paper (backed with 3L double sided adhesive) to cut the spout, handle, and lid. I adhered a piece of Judikins embossable plastic behind the Bazzill piece, and then attached the spout, handle, and lid in place. I left the body of the tea pot uncovered for all the shaker elements to be seen.
To create the well for the shaker elements, I doubled up two layers of 2mm purple craft foam, again using the 3L double sided adhesive sheets. This made for a nice deep space for the sequins to move around freely.

I flipped over the front panel and placed scor-tape all around the openings and the purple foam, so that it would be securely attached to the card base. I then filled up the tea pot with an assortment of sequins from my stash - in pink, purples, and white. The landscape A2 side fold card base was made from sturdy Neenah 110 lb Solar White cardstock.
Once everything was attached and the sequins secured inside the tea pot, I was ready to finish decorating the front of the card. I used some of the same sequins and attached them with small dots of glossy accents. I also cut the tea bag from Bazzill Robin's Egg cardstock and a small piece of turquoise craft foam covered in the 3L double sided adhesive. I removed the center heart and replaced it with an inlaid shimmery pink heart cut from Rose Quartz Stardream 105 lb metallic cardstock. The tea bag was attached to the bottom corner of the card front, and the string was drawn on using a Sakura Stardust pen in Green Star.

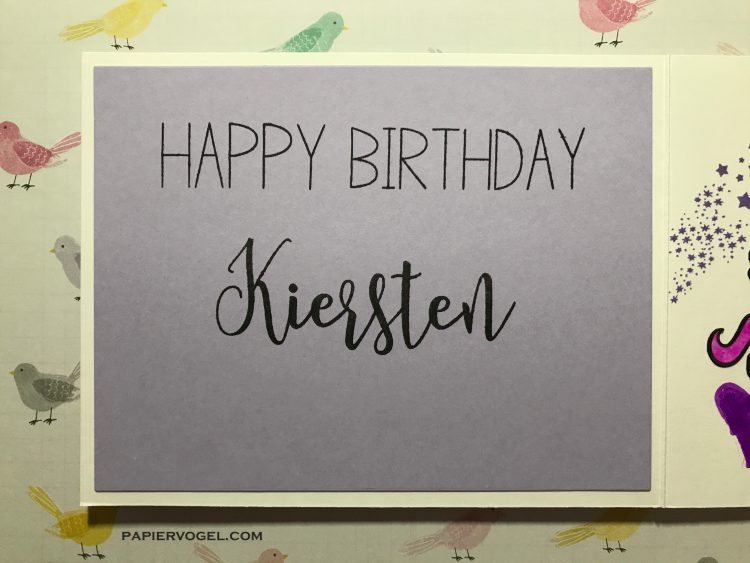
The inside of the card was decorated on both sides since I chose not to add any sentiments to the front. On the left side I stamped "Happy Birthday" from Simon Says Stamp's Celebrate set, and the birthday girl's name from Concord & 9th's Sophisticated Script and Sophisticated Script Uppercase, both in Versafine Onyx Black ink.

The right side was decorated with two fussy cut pegasus images from Avery Elle's Pegasus Duo set and stamped mini stars from the same set. The sentiment and other stars were from The Greeting Farm's Magical Day and Be A Unicorn sets. Once my daughter had colored in the two pegasus images, we adhered them to the card, and she signed her name.

I went over the word "magical" with a clear Sakura stardust pen, which gave it a nice glittery shimmer that really shines when it catches the light.

And then the last step was to make a custom envelope using the Envelope Punch Board from We R Memory Keepers, as the card was pretty thick and wouldn't fit well into a standard A2 envelope.